Note that the products discussed on our site are independently selected by our editors. Your purchases through our recommendations may earn us a commission at no extra cost to you.

Do you love home improvements? Are you ready for the challenge of installing your very own wall sconce from scratch? If you answered yes to those questions, you’re in the right place. All you need to do is sit back, relax, and be prepared to be guided step by step on how you can install a wall sconce from scratch.
What Is a Wall Sconce?
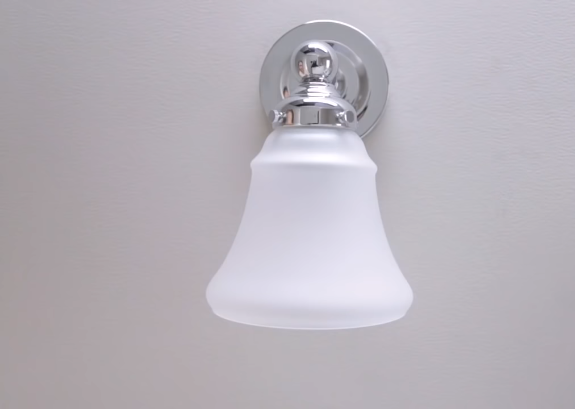
Firstly, some of you may be asking yourself what exactly is a wall sconce. A wall sconce, simply put is another word for a light fixture or a wall light. Wall sconces are used to hold different types of light sources such as a lamp, light bulb, or even a candle. Generally, the most popular use for wall sconces is to hold an electric light bulb, and this is what we’ll be focusing on in this step by step guide on how to install a wall sconce.
Related read: 15 of the best wall sconces
Wall sconces come in many different style variations to suit your personal taste and existing décor. Once you have chosen, your desired style of wall sconce, you should also choose which design style you’d like to have. There are three main design styles to choose from; including an up-light wall sconce, this design directs light upwards. This is a good choice if you need some extra light in a room or space and would also like to make the room or space appear more open.
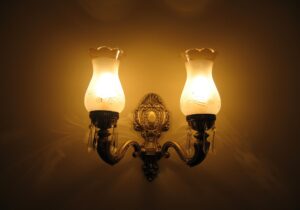
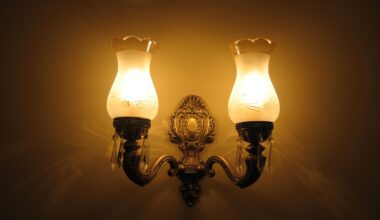
Another design style you could choose is the downlight wall sconce, which you may have already guessed directs light downwards. This is a great option if you want to add some warm ambiance to a room or space. Finally, the last design style is an all-around wall sconce which directs light upwards and downwards. This type of wall sconce design can really add a lot of light to a room or space, making it a great choice for dark areas in need of some much-needed light.
Now you’ve got the low down on what a wall sconce is; it’s time to learn step by step how to install a wall sconce that will light up your chosen room or space.
What You’ll Need
Firstly, you will need to make sure you have the right equipment to install your wall sconce. You’ll need the following:
A Screwdriver
This tool can either be manual or powered. Screwdrivers tend to have a handle and a shaft made of steel with a cross-shaped tip. This will be used for screwing and unscrewing screws.
A Flathead Screwdriver
A flathead screwdriver has all the same features of a standard screwdriver except it has a flat tip. It’s also used for screwing and unscrewing screws.
Electrical Tape
This is a thick adhesive tape that is used to insulate electrical wires or other materials that conduct electricity.
A Light bulb
This is a glass bulb which will be inserted in the light fixture to provide electric light.
You’ll also need the sconce and the hardware that’s included with it, once you have all the equipment, you’re ready to get going.
How to Install a Wall Sconce?
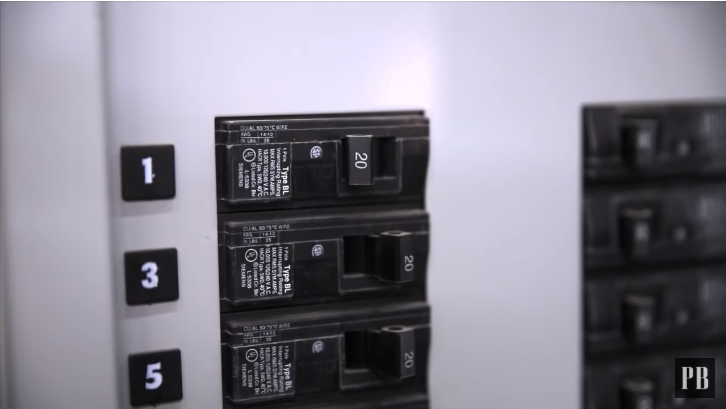
Step 1: turn off power source
The first thing you’ll need to do is to make sure you’re safely installing your wall sconce. To do this, you’ll need to make sure you switch the main electrical supply off from the fuse box or circuit breaker. You should also switch off the power on the light switch that controls the light, as you can never be too safe.
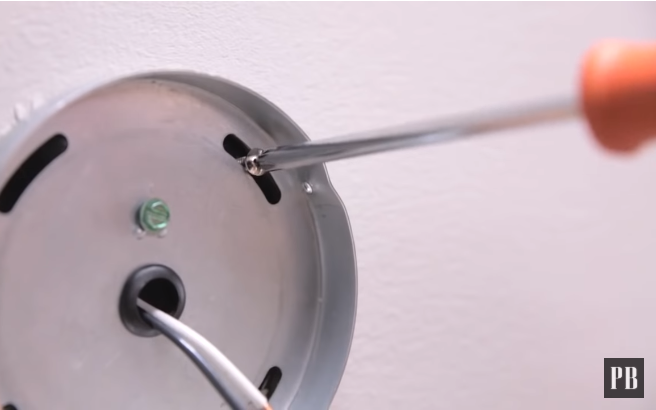
Step 2: unscrew the mounting plate
Next, you will need to get your wall sconce and unscrew the mounting plate from the base of the wall sconce.
Step 3: locate the outlet box wires
Once you have successfully removed the mounting plate, you’ll need to locate the wires attached to the wall outlet box. Then you’ll need to gently pull the wires and carefully guide them through the middle of the mounting plate.
Step 4: secure the mounting plate
To secure the mounting plate, use your screwdriver to tightly screw the provided mounting plate screws to the outlet box.
Step 5: connect the ground wire
Next, you’ll need to gently wrap the ground wire (the green wire) around the ground screw (the green screw) in the mounting plate. Then using your flathead screwdriver, tighten the ground screw. Ensuring the outlet box is properly grounded is a very important step, so please don’t rush it.
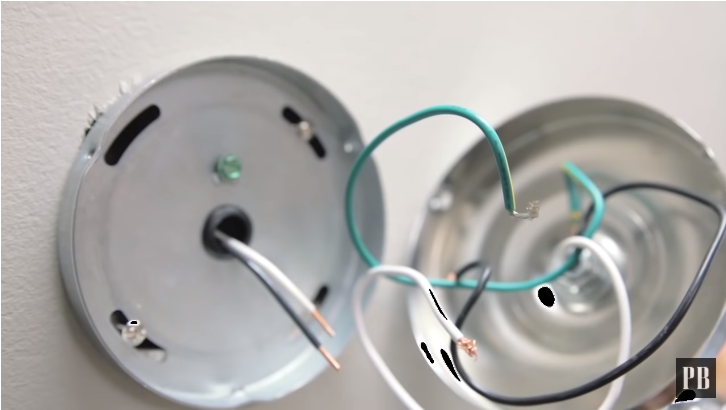
Step 6: connect the neutral wire
Once step 5 has been completed, you’ll need to connect the white neutral outlet wire with the white neutral fixture wire. To do this, you’ll need to use the plastic wire connector. Once the wires have been connected wrap them securely with electrical tape. When you’re wrapping the wires with electrical tape make sure the metal parts of the wire are completely covered.
Step 7: connect the hot wires
Repeat the process in step 6, but this time use the black hot wires. Once again, you’ll need to make sure the wires aren’t outside the wire connectors and that the wires have been securely wrapped with the electrical tape.
Safety Tip:
Never reverse the hot and neutral connections.
Step 8: secure the sconce to the mounting plate
Next, you’ll need to get the base of your wall sconce and attach it to the mounting base using the flat-headed screwdriver to secure it in place.
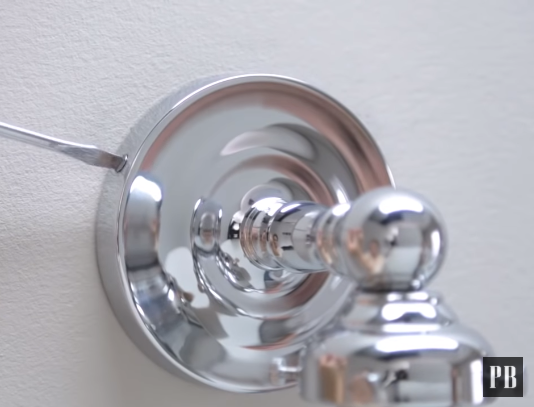
Step 9: install the shade cup
Once step 8 has been completed, you’ll now need to insert the shade cup and tighten the thumbscrews to hold it securely in place (make sure you don’t do it too tightly).
Step 10: insert the light bulb
For the final step, you’ll need to insert the light bulb and turn the power back on at the fuse box or circuit breaker. You’ll also want to turn the light switch on that controls the light fixture. And just like that, you’ll have installed your very own working wall sconce from scratch. Pat yourself on the back!

What Is the Standard Height of A Wall Sconce?
Wall sconces tend to be installed at a general height. This is to make sure the top of the sconce can’t be seen. If it could be seen, it would defeat the whole purpose and aesthetic of having a wall sconce. The general height wall sconces are installed at is 5.5 feet to 6 feet or 66 inches to 72 inches. This height usually makes sure the average person will see the wall sconce in their usual line of sight, but they won’t see the top of the wall sconce.
To Wrap It Up
Hopefully, after reading this article, you’re now aware of what a wall sconce is and the different types of designs you can use depending on the goals you have. You should also be feeling very confident in the process of how to safely install your wall sconce from scratch, or maybe you’ve already installed it as you were reading the article! Wall sconces can be a beautiful addition to your home and bring some much-needed extra light or even open a room up. After reading our step by step guide on how to install a wall sconce from scratch, we hope you will agree it’s a pretty easy task that can add a whole new vibe to a room or space. What are you waiting for? Install your very own wall sconce and give your home some extra love.
Next Read
Thinking of installing wall lights? The question may pop up in your mind, “Are wall sconces outdated?”. Worry no more… We are going to find out in this article.
Sources
Video of PotteryBarn: https://www.youtube.com/watch?v=gj8mtVMbb4c

Conversation
No Comments here